
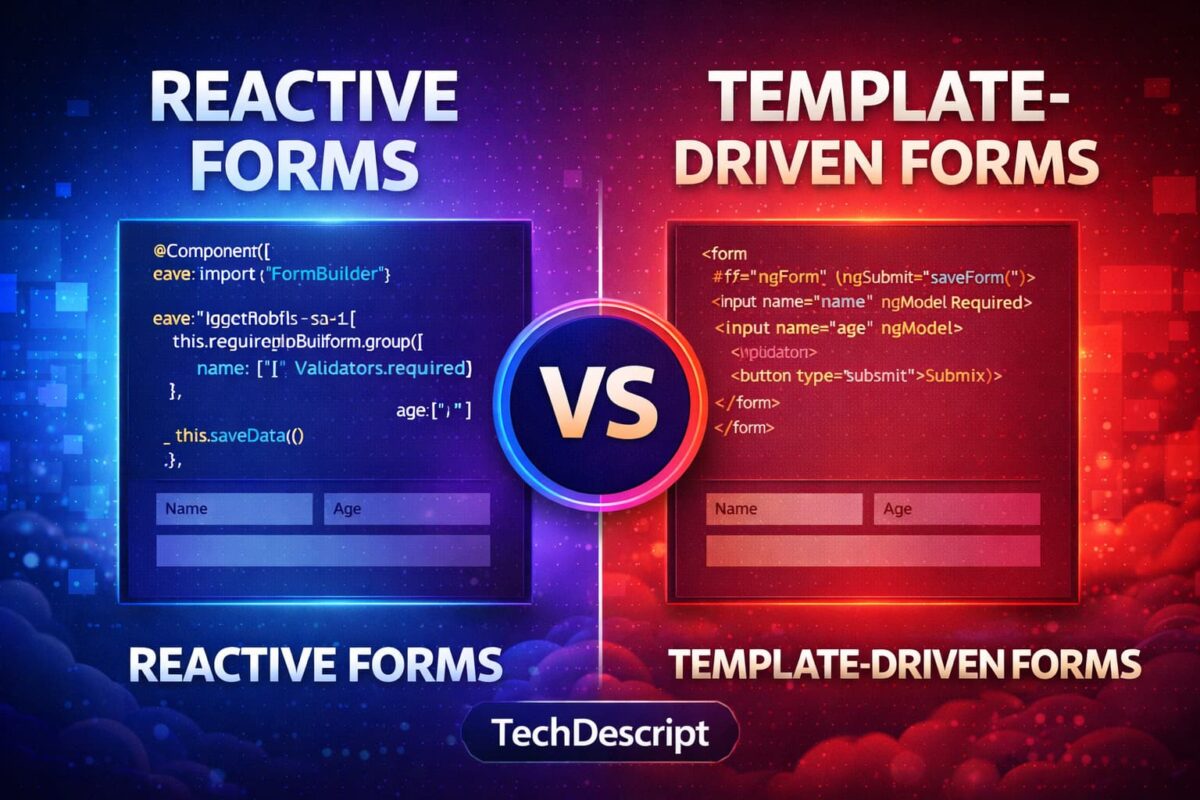
If you’re learning Angular, one of the first things you’ll encounter is forms. They’re everywhere login pages, signup forms, contact forms, surveys, and user settings. Forms are the backbone of user interaction, and Angular gives you two main ways to build them:
- Template-Driven Forms – simple, HTML-driven, beginner-friendly
- Reactive Forms – structured, TypeScript-driven, powerful for complex apps
Understanding both is important so you can choose the right one for your project. In this guide, we’ll compare Reactive Forms vs Template-Driven Forms in Angular with real-world examples, covering common form controls like textboxes, buttons, selects, and checkboxes. By the end, you’ll know the pros and cons of each approach and when to use them.
Before diving into forms, make sure you understand the basics of Angular. You can read my detailed guide on Learn Angular for Beginners in 2026: Complete Step-by-Step Guide.
Reactive Forms: Structured and Powerful
When it comes to building complex forms in Angular, Reactive Forms vs Template-Driven Forms is often the big debate. Reactive Forms give you full control by defining the form structure directly in your component using TypeScript.
Unlike Template-Driven Forms, where Angular quietly manages things behind the scenes, Reactive Forms make everything explicit. This means you can easily handle validation, dynamic fields, and advanced form logic without scattering code across your HTML.
Think of Reactive Forms as the “professional toolkit” for Angular developers. They’re predictable, testable, and perfect for apps that need scalability.
Think of Reactive Forms as the “professional toolkit” for Angular developers. They’re predictable, testable, and perfect for apps that need scalability.
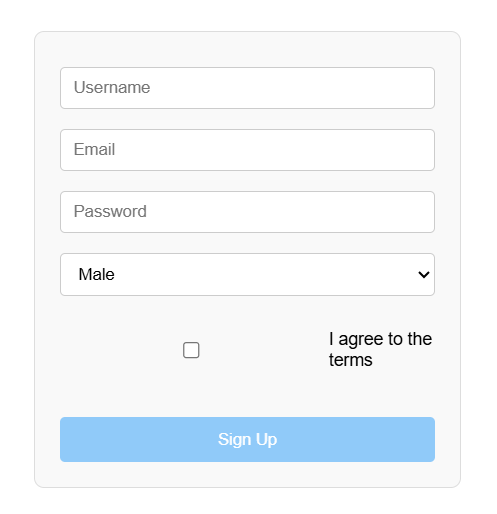
Example Of Reactive Form (Signup Form)
Let’s walk through a practical example a signup form with validation for username, email, password, gender, and a checkbox for agreement.
Typescript File
import { Component, VERSION } from '@angular/core';
import { FormGroup, FormControl, Validators } from '@angular/forms';

@Component({
  selector: 'my-app',
  templateUrl: './app.component.html',
  styleUrls: ['./app.component.css']
})
export class AppComponent  {
  name = 'Angular ' + VERSION.major;

  // Reactive form setup
  signupForm = new FormGroup({
    username: new FormControl('', Validators.required),
    email: new FormControl('', [Validators.required, Validators.email]),
    password: new FormControl('', [Validators.required, Validators.minLength(6)]),
    gender: new FormControl('male'),
    agree: new FormControl(false)
  });

  onSubmit() {
    console.log('Form Data:', this.signupForm.value);
  }
}- FormGroup: This is the container for the entire form. It holds multiple controls.
- FormControl: Each input field (username, email, password, etc.) is represented as a FormControl.
- Validators: Angular provides built-in validators like required, email, and minLength. These ensure the user enters valid data before submitting.
- Default values: Notice how gender is set to ‘male’ by default, and agree starts as false.
- The onSubmit() method simply logs the form data, but in a real app, you’d send it to a backend API.
Here, the form structure is defined entirely in the component. Each field has its own validation rules, making the form predictable and easy to test.
Template (Html file)
<h1>Welcome to {{ name }}</h1>
<p>Start editing to see some magic happen :)</p>

<!-- Signup Form -->
<form [formGroup]="signupForm" (ngSubmit)="onSubmit()">
  <input formControlName="username" placeholder="Username">
  <div *ngIf="signupForm.get('username')?.invalid && signupForm.get('username')?.touched">
    Username is required.
  </div>

  <input formControlName="email" placeholder="Email">
  <div *ngIf="signupForm.get('email')?.invalid && signupForm.get('email')?.touched">
    <div *ngIf="signupForm.get('email')?.errors?.required">Email is required.</div>
    <div *ngIf="signupForm.get('email')?.errors?.email">Invalid email format.</div>
  </div>

  <input type="password" formControlName="password" placeholder="Password">
  <div *ngIf="signupForm.get('password')?.invalid && signupForm.get('password')?.touched">
    <div *ngIf="signupForm.get('password')?.errors?.required">Password is required.</div>
    <div *ngIf="signupForm.get('password')?.errors?.minlength">
      Password must be at least 6 characters.
    </div>
  </div>

  <select formControlName="gender">
    <option value="male">Male</option>
    <option value="female">Female</option>
  </select>

  <label>
    <input type="checkbox" formControlName="agree"> I agree to the terms
  </label>

  <button type="submit" [disabled]="signupForm.invalid">Sign Up</button>
</form>- FormGroup: This is the container for the entire form. It holds multiple controls.
- FormControl: Each input field (username, email, password, etc.) is represented as a FormControl.
- Validators: Angular provides built-in validators like
required,email, andminLength. These ensure the user enters valid data before submitting. - Default values: Notice how
genderis set to'male'by default, andagreestarts asfalse.
The onSubmit() method simply logs the form data, but in a real app, you’d send it to a backend API.
This template shows how validation messages appear when fields are invalid. Notice how the logic is cleanly separated: the form structure and validation rules live in the component, while the template simply displays inputs and error messages.
Why use reactive forms?
1. Full control over form data
You define the entire form structure in TypeScript, which means you know exactly how the form behaves. Nothing is hidden behind the scenes.
2. Easy to validate and test
Validators are applied directly in the component, making complex rules simple to manage. Since the logic is explicit, writing unit tests for Reactive Forms is straightforward.
3. Perfect for dynamic and complex forms
Need to add or remove fields at runtime? Reactive Forms handle this easily with FormArray. This makes them ideal for enterprise apps or situations where forms evolve based on user input.
Recommendation:-
If you’re new to Angular, check out my complete guide, Learn Angular for Beginners in 2026: Complete Step-by-Step Guide, to build a strong foundation.
Template-Driven Forms: Simple and Easy
When comparing Reactive Forms vs Template-Driven Forms in Angular, Template-Driven Forms are the easier option. They use plain HTML along with Angular directives like ngModel. Most of the logic stays in the template, which makes them beginner-friendly. If you’re new to Angular, this approach feels familiar because it looks just like a normal HTML form with a little Angular added in.
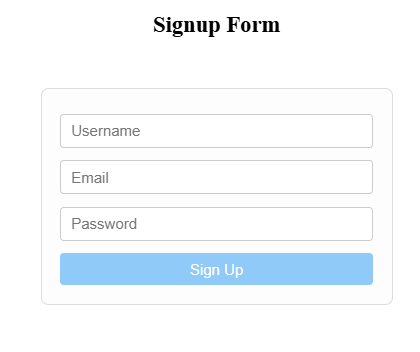
Example: Basic Signup Form
Here’s a simple signup form built with Template-Driven Forms:
Typescript File
import { Component } from '@angular/core';

@Component({
  selector: 'my-app',
  templateUrl: './app.component.html',
  styleUrls: ['./app.component.css'] // Make sure this is here
})
export class AppComponent {
  signupData = {
    username: '',
    email: '',
    password: ''
  };

  onSubmit(form: any) {
    console.log('Form Submitted:', this.signupData);
    form.resetForm();
  }
}Here, we simply define an object (signupData) to store the form values. Angular automatically binds the inputs to this object using ngModel.
Html File
<h2>Signup Form</h2>

<form #signupForm="ngForm" (ngSubmit)="onSubmit(signupForm)">

  <!-- Username -->
  <input
    name="username"
    [(ngModel)]="signupData.username"
    placeholder="Username"
    required>

  <!-- Email -->
  <input
    name="email"
    [(ngModel)]="signupData.email"
    placeholder="Email"
    type="email"
    required>

  <!-- Password -->
  <input
    name="password"
    [(ngModel)]="signupData.password"
    placeholder="Password"
    type="password"
    required>

  <!-- Submit button -->
  <button type="submit" [disabled]="!signupForm.form.valid">Sign Up</button>

</form>In the template, each input field is connected to the signupData object using [(ngModel)]. Angular automatically keeps the data in sync, and the form reference (#signupForm="ngForm") gives you access to the form state.
Why Use Template-Driven Forms?
- Quick to set up – Angular handles most of the wiring for you.
- Beginner-friendly – Perfect if you’re new to Angular or just want something simple.
- Great for small forms – Ideal for login, contact, or feedback forms where you don’t need complex validation.
Reactive Forms vs Template-Driven Forms
Here’s a quick side-by-side comparison to understand the key differences:
| Point | Reactive Forms | Template-Driven Forms |
|---|---|---|
| Where code is written | In TypeScript file | In HTML template |
| Control | Full control (you manage everything) | Less control (Angular manages most) |
| Difficulty | Slightly harder | Very easy |
| Best for | Big & complex forms | Small & simple forms |
| Validation | Done in TypeScript | Done in HTML |
| Flexibility | High | Limited |
When to Use Reactive Forms
Use Reactive Forms when:
- You are building large or complex forms
- You need dynamic fields (add/remove inputs)
- You want strong validation control
- You are working on enterprise-level applications
- You need easy unit testing
When to Use Template-Driven Forms
Use Template-Driven Forms when:
- Your form is simple (login, contact form)
- You want quick development
- You are a beginner in Angular
- You don’t need complex validation
- Your form structure is static
In real-world projects, developers often prefer Reactive Forms for scalability, while Template-Driven Forms are great for quick and simple use cases.
Conclusion
Reactive Forms and Template-Driven Forms both help you handle user input in Angular, but they serve different purposes.
Reactive Forms give you more control, better scalability, and are ideal for complex applications. On the other hand, Template-Driven Forms are simple, quick to set up, and perfect for small forms.
- If you’re building a large or dynamic application, go with Reactive Forms.
- If you need something simple and fast, Template-Driven Forms work just fine.
In the end, choosing the right approach depends on your project requirements.