
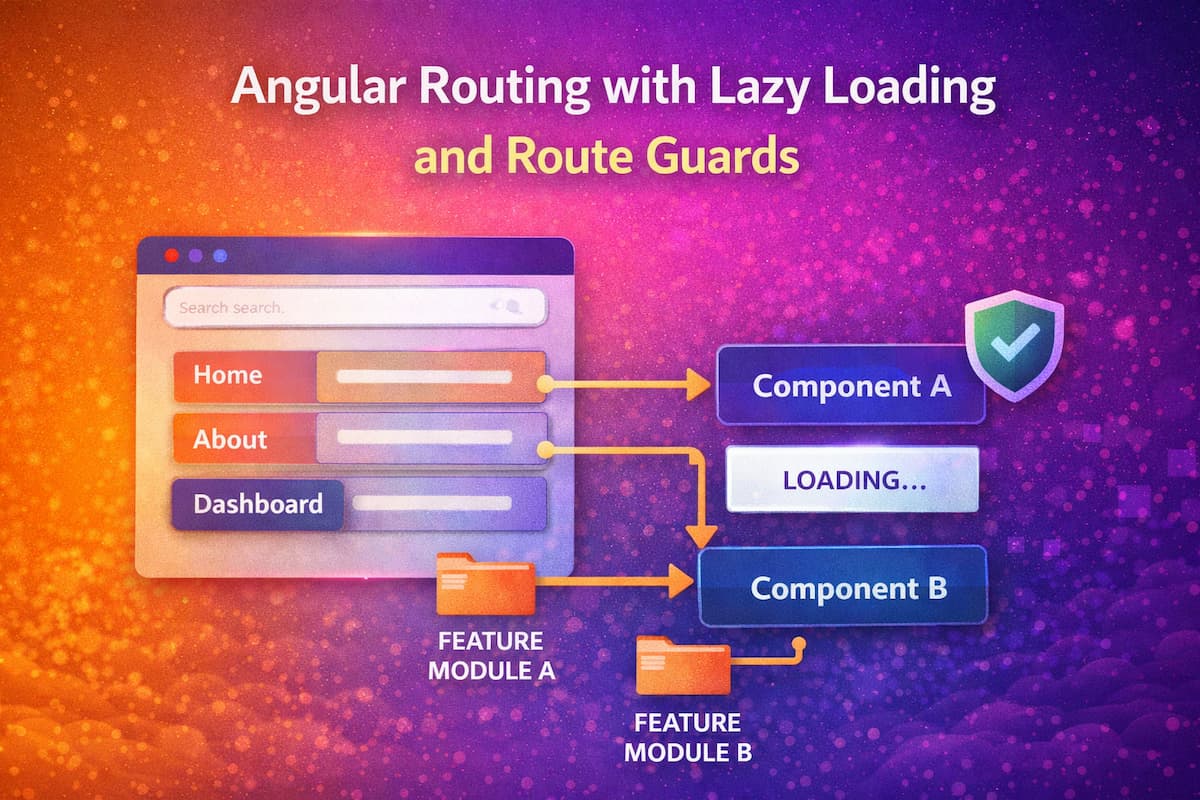
When you’re building apps in Angular, sooner or later you’ll need Angular Routing. It’s what lets people move around your app — from the home page to products, or into an admin dashboard — without hitting refresh.
The problem is, once your app gets bigger, routing can slow things down or get messy. That’s why I like to use lazy loading to keep things fast, and route guards to keep private pages secure.
Nothing fancy, just practical code you can copy, try out, and reuse. By the end, you’ll have a clean routing setup that feels professional but is simple enough to build on for your own apps.
In this post, I’ll walk you through setting up Angular routing step by step. Here’s what we’ll cover:
- Setting up basic routes in Angular – so your app has pages that actually navigate.
- Adding lazy loading for feature modules – to keep your app fast as it grows.
- Creating and applying route guards – to secure pages that should only be accessible to certain users.
- Testing everything in action – so you can see your routing setup working perfectly.
By the end, you’ll have a clean, professional routing setup that’s simple enough to reuse in your own projects, yet powerful enough for real-world apps.
Step 1: Setting Up Basic Routes in Angular
Before we dive into lazy loading and route guards, we need to make sure our app has basic routing in place. This will let users navigate between pages like Home, About, or Dashboard without reloading the page.
1. Create a New Angular Project (if you don’t have one)
First, create a new Angular project to implement routing.
Open your terminal and run the following command:
ng new angular-routing-demo --routingThe
--routingflag automatically creates anapp-routing.module.tsfile where we’ll define our routes.
- Now your project is ready.
- Now we will create the components.
- Run the following commands:
2. Create Components for Each Page
To create the components run the following command in your project folder.
ng generate component home
ng generate component about
ng generate component dashboardNow you can see your components ready in your project.
HomeComponent→ will show on/homeAboutComponent→ will show on/aboutDashboardComponent→ will show on/dashboard
3. Define Routes in app-routing.module.ts
In Angular, routing is configured inside the app-routing.module.ts file. This is where we define how different URLs map to different components.
app-routing.module.ts
import { NgModule } from '@angular/core';
import { RouterModule, Routes } from '@angular/router';
import { HomeComponent } from './home/home.component';
import { AboutComponent } from './about/about.component';
import { DashboardComponent } from './dashboard/dashboard.component';

//Route Configuration
const routes: Routes = [
  { path: 'home', component: HomeComponent },
  { path: 'about', component: AboutComponent },
  { path: 'dashboard', component: DashboardComponent },
  { path: '', redirectTo: '/home', pathMatch: 'full' },
  { path: '**', redirectTo: '/home' } // wildcard route
];

@NgModule({
  imports: [RouterModule.forRoot(routes)],
  exports: [RouterModule]
})

export class AppRoutingModule { }Understanding Each Route
Let’s break this down step by step:
1. Normal Routes
{ path: 'home', component: HomeComponent }This means:
- When the user navigates to
/home - Angular loads the
HomeComponent
Similarly:
{ path: 'about', component: AboutComponent }
{ path: 'dashboard', component: DashboardComponent }2. Default Route (Redirect)
{ path: '', redirectTo: '/home', pathMatch: 'full' }This means:
- When the URL is empty (
/) - The user is redirected to
/home
pathMatch: ‘full’ ensures:
- The entire URL must match exactly (not partially)
3. Wildcard Route (404 Handling)
{ path: '**', redirectTo: '/home' }This means:
- If the user enters an invalid URL (for example,
/xyz) - They will be redirected to
/home
This acts as a fallback route (similar to a 404 page).
Importing Routes into Angular
@NgModule({
  imports: [RouterModule.forRoot(routes)],
  exports: [RouterModule]
})
export class AppRoutingModule { }What this does:
RouterModule.forRoot(routes)
- Registers all routes in the application
- Should be used only once in the root module
exports: [RouterModule]
- Makes routing available throughout the application
4. Add Navigation Links
app.component.html:
<nav>
  <a routerLink="/home" routerLinkActive="active">Home</a> |
  <a routerLink="/about" routerLinkActive="active">About</a> |
  <a routerLink="/dashboard" routerLinkActive="active">Dashboard</a>
</nav><router-outlet></router-outlet>- routerLink → links to routes
- routerLinkActive → highlights the active page
- router-outlet → where the selected component will render
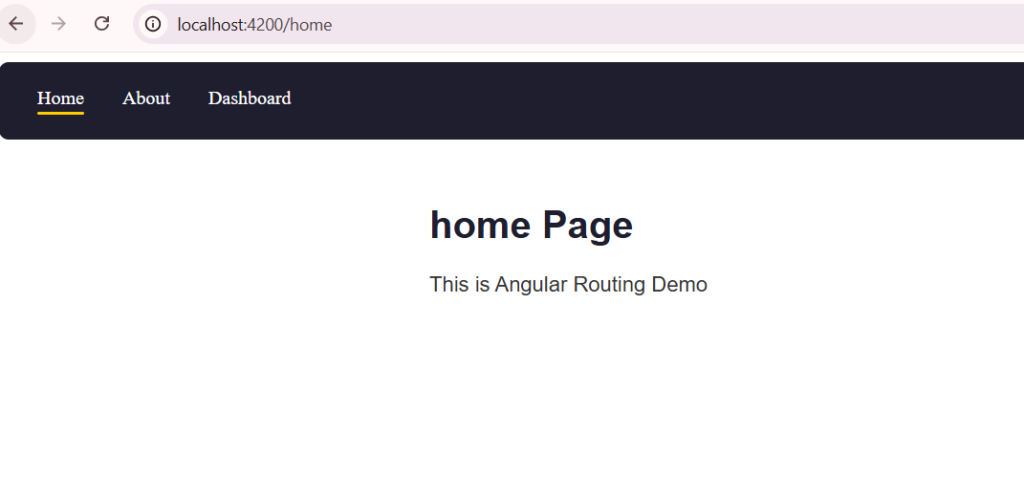
After setting up the navigation links in app.component.html, your app should look like this:
- The navbar at the top shows links to Home, About, and Dashboard.
- By default, the Home page is displayed when the app loads.
- Clicking on the links doesn’t refresh the page — Angular handles the routing automatically.
Step 2: Adding Lazy Loading In Angular Routing
So far, we created basic routes like /home, /about, and /dashboard in our main routing file.
Now imagine your app grows and you add a new section like an Admin panel. If we keep adding
everything to the main module, the app will become slow.
This is where lazy loading helps.
Instead of loading everything at once, Angular loads a module only when the user visits that route.
What Are We Going to Do?
We will:
- Create a new Admin module
- Load it only when the user visits
/admin - Keep our main app fast and clean
1. Create a Lazy Loaded Module For Angular Routing
Make sure you are inside your project folder (same place where you ran previous commands like
ng generate component
Now run:
ng generate module admin --route admin --module appThis command does everything for you:
- Creates a new folder called admin
- Creates admin.module.ts
- Creates admin-routing.module.ts
- Automatically connects it to your main routing
So you don’t need to manually configure everything.
What Gets Created?
After running the command, your project will have:
/src/app/admin/
  ├── admin.module.ts
  ├── admin-routing.module.ts
└── (components inside admin)This is your lazy-loaded feature module for Angular Routing
2. Check Your Main Routing File
Now go back to your app-routing.module.ts.
You’ll see a new route added:
const routes: Routes = [
  {
    path: 'admin',
    loadChildren: () =>
      import('./admin/admin.module').then(m => m.AdminModule)
  }
];What Does This Mean?
This line is the key:
loadChildren: () =>
import('./admin/admin.module').then(m => m.AdminModule)In simple words:
Angular is saying:
“Don’t load the Admin module right now.
Load it only when the user visits /admin.”
Earlier, we used:
{ path: 'home', component: HomeComponent }That loads the component immediately
But now:
{ path: 'admin', loadChildren: ... }This loads the module only when needed
That’s the main difference.
Why I Personally Use Lazy Loading
From my experience, it really helps when the app grows:
- The app loads faster
- Only required code is loaded
- Keeps things more organized
When Should You Use It?
You don’t need it everywhere. I usually use lazy loading for:
- Admin panels
- Dashboard sections
- Large features
Quick Summary
- Lazy loading loads modules only when the user visits that route
- It uses
loadChildrenin routing - It helps improve performance and keeps your app clean
Step 3: Creating Route Guards
So far, we’ve set up routing and even added lazy loading. Now let’s talk about something very important — security.
In real-world apps, not every page should be accessible to everyone. For example, you probably don’t want users to access the Dashboard or Admin page without logging in.
This is where route guards come in.
What is a Route Guard?
A route guard is used to control access to routes.
In simple terms:
It decides whether a user is allowed to visit a page or not.
What Are We Going to Do?
We will:
- Create an Auth Guard
- Protect a route (like
/dashboard) - Allow access only if the user is “logged in”
1. Create a Route Guard
Run the following command:
ng generate guard authAngular will ask:
Which interfaces would you like to implement?Select:
CanActivateWhat Gets Created?
Angular will create a file:
auth.guard.tsThis file contains the logic to allow or block access.
2. Add Logic to the Guard
Open auth.guard.ts and update it like this:
import { Injectable } from '@angular/core';
import { CanActivate } from '@angular/router';

@Injectable({
  providedIn: 'root'
})
export class AuthGuard implements CanActivate {

  canActivate(): boolean {
    const isLoggedIn = false; // change this to true to allow access

    if (isLoggedIn) {
      return true;
    } else {
      alert('Access denied. Please log in.');
      return false;
    }
  }
}What’s Happening Here?
When a user tries to access a route:
- If isLoggedIn = true → access allowed
- If isLoggedIn = false → access denied
Note:
In this demo, we don’t have a real login system.
The AuthGuard uses a simple variable (isLoggedIn) to simulate logged-in users.
In a real app, you would check a login token or authentication service instead.
3. Apply Guard to a Route
Now go to your app-routing.module.ts and update the dashboard route:
{
  path: 'dashboard',
  component: DashboardComponent,
  canActivate: [AuthGuard]
}How This Works
Now when someone tries to visit:
/dashboardAngular will:
1. Call the AuthGuard
2. Check canActivate()
3. Allow or block access
Tip
You can also redirect users instead of just blocking them:
constructor(private router: Router) {}

canActivate(): boolean {
  const isLoggedIn = false;

  if (!isLoggedIn) {
    this.router.navigate(['/home']);
    return false;
  }

  return true;
}Quick Summary
- Route guards protect routes
- canActivate controls access
- Used for login-based pages
- Added using canActivate in routes
Conclusion
In this post, we went step by step and built a complete Angular Routing setup.
We started with basic Angular Routing to navigate between pages like Home, About, and Dashboard. Then we improved performance using lazy loading, so our app only loads what’s needed. Finally, we added route guards to protect important pages and control access.
At this point, you have a solid foundation to handle Angular Routing in real-world applications.
From here, you can take things further by:
- Connecting route guards with a real authentication system
- Creating a proper 404 (Not Found) page instead of redirecting
- Organizing larger apps into multiple lazy-loaded modules
The main idea is simple: keep your Angular Routing clean, load only what you need, and always protect sensitive routes.