
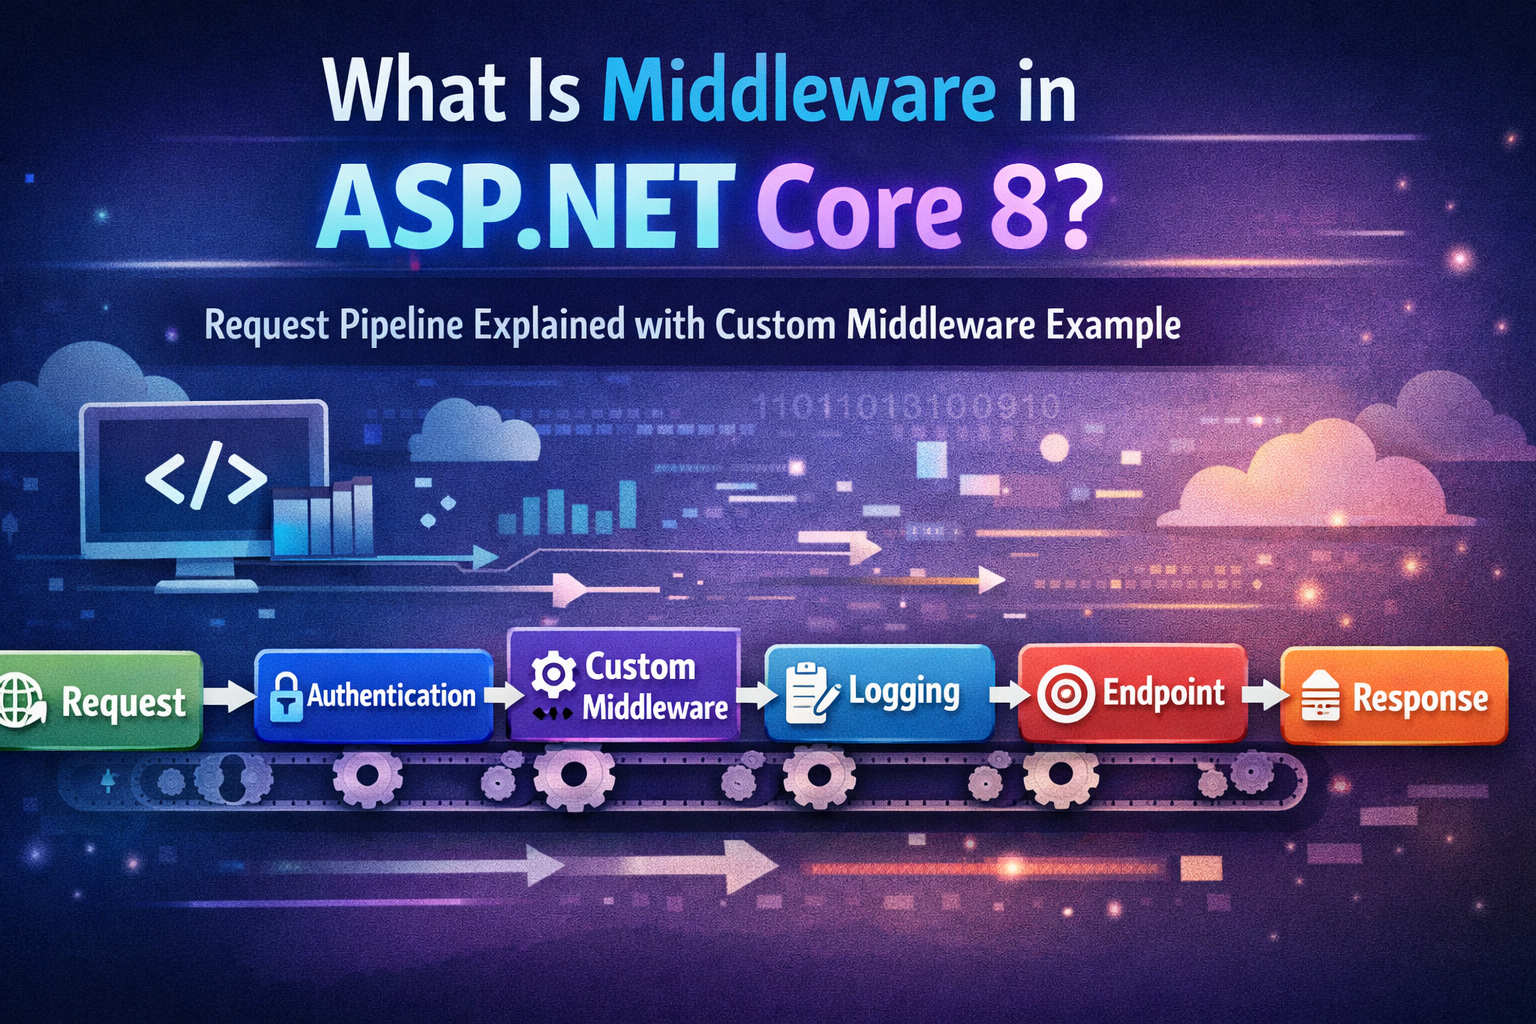
When you run an ASP.NET Core Web API project (If you’re new to Web APIs, read our beginner guide on What Is Web API in .NET? Explained Simply) and send a request from Postman, it feels simple. You hit an endpoint, you get a response. That’s it.
But internally, it’s not that simple.
Before your request even reaches the controller, it passes through multiple steps. Authentication might validate your token. Logging might record the request. Routing decides where it should go. Sometimes the request never even reaches the controller at all.
That flow — the path your request follows inside the application — is controlled by middleware.
To be honest, Middleware in ASP.NET Core 8 is one of those concepts that sounds complicated at first. When I initially saw terms like “request pipeline” and RequestDelegate, it felt abstract. But once you understand the basic idea, it’s actually straightforward.
Every request enters the application and moves through a chain of components. Each component can do something with the request and then decide whether to pass it forward or stop it there. That’s really all middleware is.
If you’re working with ASP.NET Core 8, understanding middleware helps you understand how things like authentication, authorization, exception handling, and even caching actually work behind the scenes.
If you’re confused about different .NET versions, you can read our detailed comparison of Difference between .NET Framework, .NET Core & .NET 8.
In this article, we’ll go step by step. First, we’ll understand what middleware really means. Then we’ll look at how the request pipeline works. After that, we’ll build a simple custom middleware so you can see everything in action.
Let’s start from the beginning.
What Is Middleware in ASP.NET Core?
Middleware is basically a piece of code that assemble in application pipeline. that runs on every HTTP request coming into your application. Think of it like a checkpoint in the request’s journey. Each checkpoint can look at the request, modify it, perform some action, and then either pass it along to the next checkpoint or stop it right there.
Imagine you’re at an airport. You go through multiple checkpoints: security, passport control, customs. Each checkpoint checks something and decides whether you can proceed. Middleware works in the same way — each component decides if the request can continue to the controller.
In simple term- request comes from browser then it pass through the middleware.
Here’s what middleware can do:
- Read the request – It can look at the HTTP request, check headers, query parameters, or body content. For example, authentication middleware reads the token to see if the user is valid.
- Modify the request – Middleware can change the request before it reaches your controller. For example, you could add a correlation ID to track requests.
- Call the next middleware – Most middleware components call the next one in the pipeline using
await next(context). If they don’t, the request stops there. - Modify the response – Middleware can also act after the controller has processed the request, modifying or logging the response before it’s sent back to the client.
In short, middleware gives you full control over how requests and responses flow through your application. You can handle authentication, logging, caching, exception handling, routing, and much more — all before your controller even runs.
common middleware in ASP.NET Core:
- Authentication – checks user tokens
- Authorization – checks user permissions
- Routing – decides which controller/action to call
- Exception Handling – catches errors globally
- Static Files – serves CSS, JS, images
Each request flows through these middleware components in the order you configure them. This order is critical — if you put authorization before authentication, your app might block users unexpectedly.
Understanding the ASP.NET Core Request Pipeline
Once you know what middleware is, the next question is: how does it all work together? That’s where the request pipeline comes in.
Every HTTP request entering your ASP.NET Core application flows through a series of middleware components before it reaches your controller. Think of it like a relay race: the request starts at the beginning, passes through each middleware “runner,” and finally reaches the controller. On its way back, the response can also pass through some of the middleware for logging or modifications.
Here’s the basic idea:
1. Request enters the application – The client sends an HTTP request to your server.
2. Passes through middleware components in order – Each middleware can inspect the request, modify it, perform actions, and then either:
- Call the next middleware using
await next(context)so the request continues - Stop execution if it has handled the request completely (like returning a cached response or handling an error)
3. Controller executes – Once the request passes all necessary middleware, it reaches the controller action.
4. Response travels back through middleware – Middleware can log or modify the response before it’s sent to the client.
Here’s a simple flow:
Client → Authentication → Logging → Routing → Controller → Response → Logging → ClientKey Points:
- Order matters: Middleware executes in the order you register them in
Program.cs. Authentication must come before authorization, for example. - HttpContext: Each middleware works with
HttpContext, which contains all request and response details. - Short-circuiting: Some middleware, like caching or exception handling, can end the request early without reaching the controller.
For example, caching middleware can return stored responses immediately. If you want to learn how to implement caching step-by-step, read our guide on How to Implement Caching in ASP.NET Core 8 Web API (Types & Examples).
How Middleware Works Internally
Now that you understand what middleware is and how the request pipeline works, it’s time to see how middleware actually works under the hood in ASP.NET Core.
At its core, every middleware component is just a class that handles a request and optionally calls the next middleware in the pipeline. Let’s break down the key pieces:
1. RequestDelegate
RequestDelegate is essentially a pointer to the next middleware in the pipeline. When you create custom middleware, you receive a RequestDelegate in the constructor so your middleware can pass the request along.
- Think of it like a baton in a relay race your middleware holds it and passes it to the next runner.
2. HttpContext
HttpContext contains all information about the current HTTP request and response:
- Request URL, headers, body
- Response status, headers, body
- User information and authentication claims
Every middleware works with HttpContext to read or modify the request or response.
3. The next() Delegate
next() or _next(context) is how you call the next middleware in the pipeline.
If you don’t call it, the request stops there which can be useful if you handle caching, authentication failures, or return a custom response early.
Example: Simple Custom Middleware
public class CustomMiddleware
{
    private readonly RequestDelegate _next;

    public CustomMiddleware(RequestDelegate next)
    {
        _next = next;
    }

    public async Task InvokeAsync(HttpContext context)
    {
        // You can add custom logic here before passing to next middleware
        Console.WriteLine("Request incoming: " + context.Request.Path);

        // Call the next middleware in the pipeline
        await _next(context);

        // You can also add logic after the next middleware has run
        Console.WriteLine("Response outgoing: " + context.Response.StatusCode);
    }
}How It Works, Step by Step
1. ASP.NET Core creates an instance of your middleware and passes in the next delegate.
2. InvokeAsync is called for every incoming request.
3. You can do something before calling _next(context), like logging or modifying the request.
3. Calling _next(context) passes control to the next middleware in the pipeline.
4. You can do something after _next(context), like logging the response or modifying headers before it goes back to the client.
How to Create Custom Middleware in ASP.NET Core 8 (Step-by-Step)
Now that we understand how middleware works inside the ASP.NET Core request pipeline, let’s build a custom middleware step by step in ASP.NET Core 8.
We will create a simple middleware that:
- Logs request details
- Adds a custom response header
- Measures request execution time
Step 1: Create a Middleware Class
Create a new folder called Middleware in your project.
Inside it, add a new class:
RequestLoggingMiddleware.csAdd the following code:
using System.Diagnostics;

public class RequestLoggingMiddleware
{
    private readonly RequestDelegate _next;

    public RequestLoggingMiddleware(RequestDelegate next)
    {
        _next = next;
    }

    public async Task InvokeAsync(HttpContext context)
    {
        var stopwatch = Stopwatch.StartNew();

        Console.WriteLine($"Incoming Request: {context.Request.Method} {context.Request.Path}");

        // Call the next middleware in the pipeline
        await _next(context);

        stopwatch.Stop();

        Console.WriteLine($"Response Status Code: {context.Response.StatusCode}");
        Console.WriteLine($"Request completed in {stopwatch.ElapsedMilliseconds} ms");

        // Add custom header
        context.Response.Headers.Add("X-Custom-Header", "MiddlewareDemo");
    }
}What’s happening here?
- RequestDelegate _next → Represents the next middleware in the pipeline.
- InvokeAsync() → Called automatically for each HTTP request.
- await _next(context) → Passes control to the next middleware.
- We log request details and add a custom header.
Step 2: (Optional but Recommended) Create an Extension Method
Create another class:
RequestLoggingMiddlewareExtensions.csAdd this code:
public static class RequestLoggingMiddlewareExtensions
{
    public static IApplicationBuilder UseRequestLogging(this IApplicationBuilder builder)
    {
        return builder.UseMiddleware<RequestLoggingMiddleware>();
    }
}This makes middleware registration cleaner and more readable.
Step 3: Register Middleware in Program.cs
In ASP.NET Core 8, everything is configured inside Program.cs.
Open Program.cs and register your middleware:
var builder = WebApplication.CreateBuilder(args);
var app = builder.Build();

// Register custom middleware
app.UseRequestLogging();

app.MapGet("/", () => "Hello World!");

app.Run();Important: Middleware runs in the order it is registered.
If you place it before authentication/authorization middleware, it runs earlier in the pipeline.
Step 4: Run and Test the Application
Run the application:
dotnet runOpen your browser:
https://localhost:5001/You should see:
Hello World!Console Output Example
Incoming Request: GET /
Response Status Code: 200
Request completed in 15 ms- If you want to see middleware working inside a complete real-world project, check our full CRUD Web API tutorial: Learn How to Create ASP.NET Core 8 Web API – Step-by-Step CRUD with SQL Server & EF Core.
How It Fits in the Request Pipeline
The flow looks like this:
Request → Custom Middleware → Next Middleware → Endpoint
Response ← Custom Middleware ← Next Middleware ← EndpointMiddleware runs:
- Before _next(context) → Pre-processing
- After _next(context) → Post-processing
Real-World Use Cases for Custom Middleware
You can build middleware for:
- Global exception handling
- Logging & monitoring
- Request/response transformation
- Authentication/authorization
- Rate limiting
- Multi-tenancy
Built-In Middleware in ASP.NET Core 8
Now that you’ve built your own custom middleware, understanding built-in middleware in ASP.NET Core 8 becomes much easier.
Built-in middleware are simply pre-written components provided by the framework that plug into the same request pipeline you just worked with.
Many applications also use caching middleware to improve performance. You can learn how to implement it in our detailed guide on How to Implement Caching in ASP.NET Core 8 Web API.
Just like your custom middleware:
app.UseRequestLogging();Framework middleware is registered in Program.cs using app.Use…() methods.
Let’s explore the most commonly used built-in middleware.
1. Authentication Middleware
Purpose:
Identifies who the user is.
Authentication middleware reads credentials (JWT, cookies, OAuth tokens, etc.) and sets the HttpContext User.
If you want to implement JWT authentication step-by-step in ASP.NET Core 8, read our complete guide on How to Implement JWT Authentication in ASP.NET Core 8 Web API.
Registration Example
Program.cs file
builder.Services.AddAuthentication("Bearer")
    .AddJwtBearer("Bearer", options =>
    {
        options.Authority = "https://your-auth-server";
        options.Audience = "your-api";
    });

var app = builder.Build();

app.UseAuthentication();What It Does in the Pipeline
Request → Authentication → Next MiddlewareIt validates the token and sets:
HttpContext.UserIt validates the token and sets:
HttpContext.UserIf no valid identity is found, the user remains unauthenticated.
2. Authorization Middleware
Purpose:
Determines what the authenticated user is allowed to access.
It checks roles, policies, or claims.
Registration Example
Program.cs file
builder.Services.AddAuthorization();

var app = builder.Build();

app.UseAuthorization();Example endpoint with authorization:
app.MapGet("/secure", () => "Secure Data")
.RequireAuthorization();Pipeline Flow
Request → Authentication → Authorization → EndpointIf authorization fails → returns 403 Forbidden.
3. Routing Middleware
Purpose:
Matches incoming requests to endpoints.
Without routing, ASP.NET Core doesn’t know which endpoint to execute.
Registration Example (Minimal APIs – ASP.NET Core 8)
Program.cs file
var app = builder.Build();

app.UseRouting();

app.MapGet("/", () => "Hello World!");In ASP.NET Core 8 with Minimal APIs, routing is automatically wired when you use MapGet, MapPost, etc., but internally it still relies on routing middleware.
How It Works
Request → Routing → Endpoint Selection → ExecutionIt decides:
- Which controller/action?
- Which minimal API?
- Which route parameters?
- If you want to understand how controllers and routing work in detail, read our beginner-friendly guide on What Is ASP.NET MVC Framework?.
4. Exception Handling Middleware
Purpose:
Handles unhandled exceptions globally.
Instead of crashing the application, it converts exceptions into proper HTTP responses.
Registration Example
if (!app.Environment.IsDevelopment())
{
    app.UseExceptionHandler("/error");
}Or for development:
app.UseDeveloperExceptionPage();Pipeline Behavior
Request → Exception Handling → Rest of PipelineIf an exception occurs anywhere later in the pipeline, it’s caught and handled here.
This is conceptually similar to writing a custom middleware that wraps _next(context) in a try-catch block.
5. Static Files Middleware
Purpose:
Serves static files like:
- HTML
- CSS
- JavaScript
- Images
From the wwwroot folder.
Registration Example
app.UseStaticFiles();Place a file:
wwwroot/index.htmlAccess it:
https://localhost:5001/index.htmlPipeline Behavior
Request → Static Files → (if file exists → return file)
→ (if not → next middleware)If the file is found, the request short-circuits the pipeline.
How Built-In Middleware Fits Together
A typical ASP.NET Core 8 pipeline looks like this:
Program.cs file
app.UseExceptionHandler("/error");

app.UseStaticFiles();

app.UseRouting();

app.UseAuthentication();
app.UseAuthorization();

app.MapControllers();

app.Run();Visual Flow

Order matters — just like with custom middleware.
Middleware Order Matters
Middleware executes in the order it is registered.
If the order is wrong, your application may:
- Return unexpected status codes
- Skip authentication
- Bypass authorization
- Fail silently
- Cause hard-to-debug issues
Let’s understand this with a real example.
Example: Authentication Must Come Before Authorization
Correct Order
Program.cs file
app.UseRouting();

app.UseAuthentication();
app.UseAuthorization();

app.MapControllers();Visual Flow (Correct Order)
Request
   ↓
Routing
   ↓
Authentication (Who are you?)
   ↓
Authorization (Are you allowed?)
   ↓
Endpoint
   ↓
Response- Authentication sets HttpContext.User
- Authorization checks roles/claims
- Everything works correctly
Wrong Order (Common Mistake)
Program.cs file
app.UseRouting();

app.UseAuthorization();   // ❌ Wrong position
app.UseAuthentication();  // ❌ Comes too late

app.MapControllers();Visual Flow (Wrong Order)
Request
   ↓
Routing
   ↓
Authorization (User not authenticated yet!)
   ↓
Authentication
   ↓
EndpointWhat Happens Here?
When UseAuthorization() runs:
- HttpContext.User is still empty
- No authentication has happened yet
- Authorization fails
Result:
403 ForbiddenEven if the user sends a valid JWT token.
Real-World Debugging Example
Imagine this scenario:
- You implemented JWT authentication.
- Postman sends a valid token.
- But every secured endpoint returns 403 Forbidden.
You double-check:
- Token is valid
- Claims are correct
- Policies are correct
But still 403.
After 2 hours of debugging you notice:
app.UseAuthorization();
app.UseAuthentication();Just switching the order fixes everything.
app.UseAuthentication();
app.UseAuthorization();Problem solved instantly.
This is one of the most common real-world mistakes.
Use vs Run vs Map in Middleware
When working with middleware in ASP.NET Core 8, you’ll frequently see three important methods:
app.Use()app.Run()app.Map()
Understanding the difference between them is essential because they directly affect how the request pipeline executes.
Let’s break them down clearly.
1. app.Use() → Continues the Pipeline
Use() adds middleware that can:
- Execute logic before
- Call the next middleware
- Execute logic after
It has access to the next delegate.
Example
Program.cs file
app.Use(async (context, next) =>
{
    Console.WriteLine("Before next middleware");

    await next();  // Pass control to next middleware

    Console.WriteLine("After next middleware");
});2. app.Run() → Terminates the Pipeline
Run() is used for terminal middleware.
- Does NOT receive
next - Does NOT call the next middleware
- Stops the pipeline immediately
Example
Program.cs file
app.Run(async context =>
{
    await context.Response.WriteAsync("Pipeline Ended Here");
});3. app.Map() → Conditional Branching
Map() creates a branch in the pipeline based on a request path.
It runs middleware only if the request matches a specific route.
Example
Program.cs file
app.Map("/admin", adminApp =>
{
    adminApp.Run(async context =>
    {
        await context.Response.WriteAsync("Welcome Admin");
    });
});

app.Run(async context =>
{
    await context.Response.WriteAsync("Public Page");
});Behavior
- Request to
/admin→ “Welcome Admin” - Request to
/→ “Public Page”
Visual Flow
Request
   ↓
Is path "/admin"?
   ├── Yes → Admin Branch → Response
└── No → Continue Main PipelineComparison Table
| Method | Calls Next? | Stops Pipeline? | Purpose |
|---|---|---|---|
| Use() | Yes | No | Wrap/extend pipeline |
| Run() | No | Yes | Final/terminal middleware |
| Map() | Depends | Branches | Conditional pipeline |
Key Takeaway
Use()→ Continue pipelineRun()→ Stop pipelineMap()→ Branch pipeline
If you understand these three methods, you truly understand how ASP.NET Core builds and executes the request pipeline.
Conclusion
Middleware is the backbone of every ASP.NET Core 8 application.
In this article, we started with the fundamentals — understanding what middleware is and how the request pipeline works. Then we explored how middleware executes internally, built our own custom middleware step by step, examined commonly used built-in middleware, learned why execution order is critical, and finally clarified the differences between Use, Run, and Map.
If there’s one key takeaway, it’s this:
The ASP.NET Core request pipeline is powerful because it is simple and composable.
Every middleware component — whether built-in or custom — follows the same core pattern:
- Execute logic before the next component
- Optionally call the next middleware
- Execute logic after it returns
Once you understand that flow, everything else becomes easier:
- Authentication and authorization behavior makes sense
- Debugging becomes faster
- Pipeline order issues become obvious
- Designing scalable applications becomes more intentional
ASP.NET Core doesn’t hide how requests are processed. Instead, it gives you full control over the pipeline — and middleware is how you shape that control.
As you build more applications, try experimenting:
- Write small custom middleware for logging or validation
- Rearrange middleware order to see how behavior changes
- Inspect
HttpContextto better understand request/response flow
The more you practice, the clearer the pipeline becomes.
Recommended Next Reads
If you want to go deeper into ASP.NET Core development:
- Difference between .NET framework, .NET Core & .NET 8 – Learn different .NET versions.
- What is .NET Full Stack Development? Beginner Guide – Understand the full .NET full stack development.
- What Is Web API in .NET? Explained Simply (ASP.NET Core Web API) – Understand and learn web API.
- What Is ASP.NET MVC Framework? Architecture, Features, Life Cycle & Example – Learn ASP.NET MVC
- How to Implement JWT Authentication In ASP.NET Core 8 Web API (Step-by-Step) – JWT Authentication
- Learn How to create ASP.NET Core 8 Web API – Step-by-Step CRUD with SQL Server & EF Core – CRUD Operation in .NET Core Web API
- How to Implement Caching in ASP.NET Core 8 Web API (Types & Examples) – Caching for Application performance improvement.