

In modern backend development, building APIs that interact with databases is essential. One of the most widely used combinations is ASP.NET Core Web API to SQL Server with Entity Framework Core.
ASP.NET Core Web API allows developers to build REST APIs, while Microsoft SQL Server is used to store and manage data efficiently.
To simplify database operations, we use Entity Framework Core (EF Core), which allows us to work with databases using C# objects instead of raw SQL queries.
If you are new to Web API concepts, you can read:
What Is Web API in .NET? Explained Simply
For EF Core basics you can refer given post:
What is Entity Framework Core? Complete Guide With Example
In this tutorial, you will learn:
- How to create ASP.NET Core Web API SQL Server project
- How to configure SQL Server connection
- How to use Entity Framework Core
- How to perform full CRUD operations
- Real-world best practices
Prerequisites for ASP.NET Core to Web API SQL Server
Before starting, make sure you have:
- .NET SDK installed (.NET 8 recommended)
- Visual Studio 2022 or VS Code
- SQL Server or SQL Server Express installed
- Basic knowledge of C#
If you are beginner in .NET development:
What is .NET Full Stack Development? Beginner Guide
For LINQ queries used in EF Core:
What is LINQ in C#? Explained with Examples
Create ASP.NET Core Web API to SQL Server Project
In this section, we will create a new ASP.NET Core Web API project that will be connected to SQL Server using Entity Framework Core.
If you are new to Web APIs, you can first understand the basics here:
What Is Web API in .NET? Explained Simply (ASP.NET Core Web API)
If you are completely new to .NET development, read this guide:
What is .NET Full Stack Development? Beginner Guide
Step 1: Open Visual Studio
Click Create a New Project
Step 2: Select Template
Choose:
ASP.NET Core Web API
Step 3: Configure Project
- Project Name: StudentApi
- Framework: .NET 8
- Enable Swagger
To understand differences between .NET versions:
Difference between .NET Framework, .NET Core & .NET 8
Step 4: Run Project
Press F5 and open Swagger UI.
If it runs successfully, your ASP.NET Core Web API SQL Server project is ready.
For full setup reference:
Learn How to create ASP.NET Core 8 Web API – Step-by-Step CRUD
Install Packages for ASP.NET Core Web API SQL Server
Install Entity Framework Core packages:
To understand EF Core in detail:
What is Entity Framework Core? Complete Guide With Example (2026)
Open the terminal and run given commands
dotnet add package Microsoft.EntityFrameworkCore --version 8.0.0
dotnet add package Microsoft.EntityFrameworkCore.SqlServer --version 8.0.0
dotnet add package Microsoft.EntityFrameworkCore.Tools --version 8.0.0Configure SQL Server for ASP.NET Core Web API SQL Server
Add connection string in appsettings.json:
For querying data later using LINQ:
What is LINQ in C#? Explained with Examples
"ConnectionStrings": {
  "DefaultConnection": "Server=YOUR_SERVER_NAME;Database=StudentDB;Trusted_Connection=True;TrustServerCertificate=True;"
}Example (Local SQL Server):
"Server=(localdb)\\MSSQLLocalDB;Database=StudentDB;Trusted_Connection=True;"Create Model in ASP.NET Core Web API (SQL Server)
Step 1: Create Models Folder
Inside your project, create a new folder named: Models
This folder will contain all your entity classes (database models).
Step 2: Create Student Model
Add a new class file inside the Models folder:
Student.cs
namespace StudentApi.Models
{
    public class Student
    {
        public int Id { get; set; }

        public string Name { get; set; }

        public string Email { get; set; }
    }
}Explanation
Id→ Primary key (auto-increment in database)Name→ Student nameEmail→ Student email address- This class will be mapped to a SQL Server table using Entity Framework Core
Create DbContext in ASP.NET Core Web API (SQL Server)
What is DbContext?
DbContext is a class in Entity Framework Core that acts as a bridge between your application and the database.
It is responsible for:
- Connecting to the database
- Querying data
- Saving data
- Tracking changes in entities
In simple terms:
DbContext = Gateway between C# code and SQL Server
Learn more about Dependency Injection used here:
Dependency Injection in ASP.NET Core: Explained with Real Examples (2026 Guide)
Step 1: Create Data Folder
Inside your project, create a new folder named: Data
This folder will contain your database context class.
Step 2: Create AppDbContext Class
Add a new class file inside the Data folder:
AppDbContext.cs
using Microsoft.EntityFrameworkCore;
using StudentApi.Models;namespace StudentApi.Data
{
    public class AppDbContext : DbContext
    {
        public AppDbContext(DbContextOptions<AppDbContext> options)
            : base(options)
        {
        }        public DbSet<Student> Students { get; set; }
    }
}Explanation
- AppDbContext → Your custom database context class
- DbContextOptions → Configuration passed from Program.cs
- : base(options) → Passes configuration to EF Core
- DbSet → Represents the Students table in SQL Server
EF Core will automatically create a table named Students
Register DbContext in Program.cs
Now that we have configured our models and connection string, the next step is to connect our application to SQL Server by registering the DbContext in the Program.cs file.
Add the following code in program.cs file.
using Microsoft.EntityFrameworkCore;
using StudentApi.Data;

var builder = WebApplication.CreateBuilder(args);

// Add services to the container
builder.Services.AddControllers();

// Register DbContext with SQL Server
builder.Services.AddDbContext<AppDbContext>(options =>
    options.UseSqlServer(
        builder.Configuration.GetConnectionString("DefaultConnection")));

// Swagger configuration
builder.Services.AddEndpointsApiExplorer();
builder.Services.AddSwaggerGen();

var app = builder.Build();

// Configure middleware
if (app.Environment.IsDevelopment())
{
    app.UseSwagger();
    app.UseSwaggerUI();
}

app.UseHttpsRedirection();
app.UseAuthorization();

app.MapControllers();

app.Run();Explanation
AddDbContext<AppDbContext>()registers the database contextUseSqlServer()configures SQL Server as the database provider- The connection string is read from
appsettings.json
Step 2: Create Database Using EF Core
Run the following commands in your terminal:
dotnet ef migrations add InitialCreate
dotnet ef database updateWhat happens here?
- A migration file is created based on your models
- The database is created automatically. Database name – StudentDB
- Tables are generated using EF Core. Table name – Students
This approach is called Code First, where the database schema is created from your C# models.
No need to manually create tables in SQL Server.
Step 3: Create CRUD Controller
Create StudentsController.cs:
using Microsoft.AspNetCore.Mvc;
using Microsoft.EntityFrameworkCore;
using StudentApi.Data;
using StudentApi.Models;

namespace StudentApi.Controllers
{
    [Route("api/[controller]")]
    [ApiController]
    public class StudentsController : ControllerBase
    {
        private readonly AppDbContext _context;

        public StudentsController(AppDbContext context)
        {
            _context = context;
        }

        [HttpGet]
        public async Task<IActionResult> GetAll()
        {
            return Ok(await _context.Students.ToListAsync());
        }

        [HttpGet("{id}")]
        public async Task<IActionResult> GetById(int id)
        {
            var student = await _context.Students.FindAsync(id);
            if (student == null) return NotFound();
            return Ok(student);
        }

        [HttpPost]
        public async Task<IActionResult> Create(Student student)
        {
            _context.Students.Add(student);
            await _context.SaveChangesAsync();
            return Ok(student);
        }

        [HttpPut("{id}")]
        public async Task<IActionResult> Update(int id, Student student)
        {
            var existing = await _context.Students.FindAsync(id);
            if (existing == null) return NotFound();

            existing.Name = student.Name;
            existing.Email = student.Email;

            await _context.SaveChangesAsync();
            return Ok(existing);
        }

        [HttpDelete("{id}")]
        public async Task<IActionResult> Delete(int id)
        {
            var student = await _context.Students.FindAsync(id);
            if (student == null) return NotFound();

            _context.Students.Remove(student);
            await _context.SaveChangesAsync();

            return Ok("Deleted successfully");
        }
    }
}How This Controller Works
- The controller receives
AppDbContextthrough constructor injection - Each method interacts with the database using Entity Framework Core
Operations performed:
- GET → Retrieves data
- POST → Inserts new data
- PUT → Updates existing data
- DELETE → Removes data
All operations use async/await for better scalability and performance.
Step 4: Run and Test API
Run the given command
dotnet runOpen the given URL in browser
https://localhost:<port>/swaggerTest the endpoints:
- GET → Fetch all students
- POST → Add a new student
- PUT → Update student details
- DELETE → Remove a student
Now you can see the API endpoints in swagger
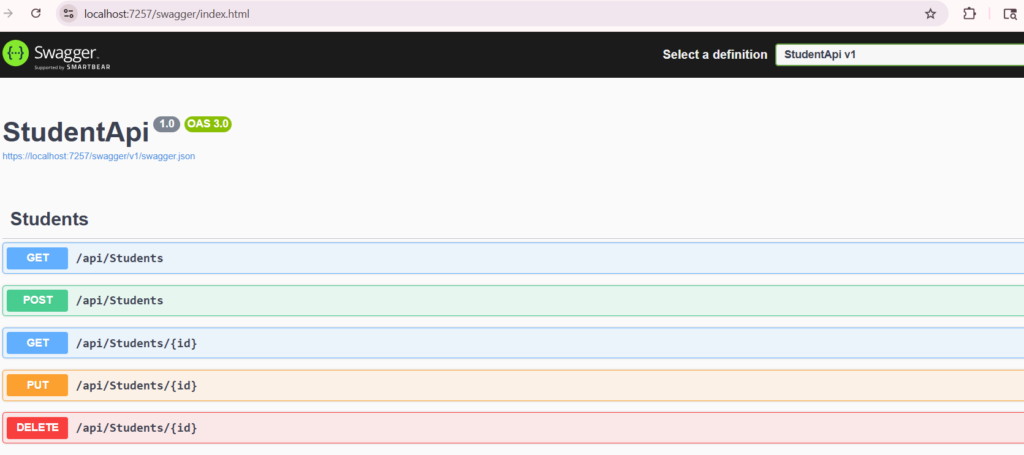
Swagger UI showing ASP.NET Core Web API SQL Server endpoints
We can see the SQL server database student table output
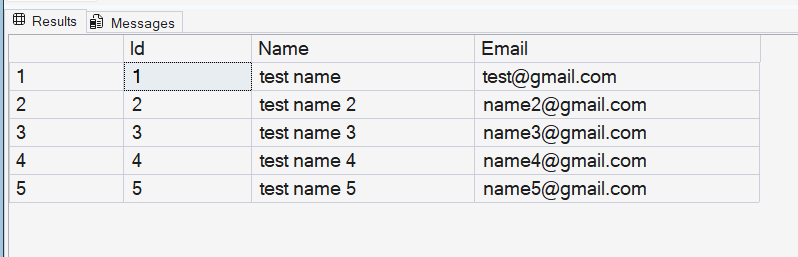
Students table created in SQL Server using Entity Framework Core
Common Error: Identity Column Issue (VERY IMPORTANT)
While testing the POST API, you may get this error:
Cannot insert explicit value for identity column in table ‘Students’
Wrong Request
{
  "id": 1,
  "name": "John",
  "email": "john@gmail.com"
}Correct Request
{
  "name": "John",
  "email": "john@gmail.com"
}Why this happens
Idis auto-generated by SQL Server- You should NOT send it from API request
- EF Core expects database to handle it
Best Practices
- Use DTOs instead of entities
- Use async/await
- Validate input
- Avoid overposting
- Keep DbContext scoped
Final Tip
If something doesn’t work, check:
- Connection string
- Migration applied
- Database created
- API URL
Conclusion
In this tutorial, we successfully learned how to build an ASP.NET Core Web API to SQL Server application using Entity Framework Core step by step.
We started by creating a Web API project, configured the SQL Server connection, and used EF Core to handle database operations efficiently. Then, we implemented full CRUD functionality and tested our APIs using Swagger UI.
By following this guide, you now have a solid understanding of how to connect and work with ASP.NET Core Web API to SQL Server in real-world applications.
This approach helps developers build scalable, maintainable, and high-performance backend systems with minimal effort.
As a next step, you can enhance your project by implementing design patterns like Repository Pattern, adding DTOs, and improving performance for production-ready applications.
Related Articles
- Difference between .NET Framework, .NET Core & .NET 8
- What is .NET Full Stack Development? Beginner Guide – Understand the full .NET full stack development.
- What Is ASP.NET MVC Framework? Architecture, Features, Life Cycle & Example – Learn ASP.NET MVC
- What Is Web API in .NET? Explained Simply
- Learn How to Create ASP.NET Core 8 Web API (CRUD Guide)
- How to Implement JWT Authentication in ASP.NET Core 8
- How to Implement Caching in ASP.NET Core 8 Web API (Types & Examples)
- What Is Middleware in ASP.NET Core 8? Request Pipeline Explained with Custom Middleware Example
- Azure for .NET Developers: Beginner Guide
- How to Optimize ASP.NET Core 8 Web API Performance
- Dependency Injection in .NET Core